Introduction
The moment I blended my first batch of cottage cheese ice cream, I genuinely couldn’t believe how creamy it turned out. No heavy cream, no ice cream maker, no complicated steps — just a blender, a few simple ingredients, and about five minutes of hands-on work before the freezer did the rest.
If you’ve been scrolling past this trend thinking it sounds weird, I completely understand. Cottage cheese as dessert feels like it shouldn’t work. But here’s the thing — once it’s blended smooth and frozen, there’s almost nothing that gives away that it started as a tub of curds. What you’re left with is a genuinely creamy, scoopable, protein-packed frozen dessert that tastes indulgent without the guilt that usually comes with a bowl of ice cream in July.
This guide walks you through seven different flavors — from a simple vanilla to a rich chocolate fudge brownie, a dreamy strawberry swirl, and even a tropical mango coconut version that tastes like a vacation. Each recipe is beginner-friendly, uses ingredients you likely already have, and comes together with minimal effort. Whether you’re working toward your health goals, feeding kids who need more protein, or just looking for a genuinely satisfying summer treat, you’re in the right place.
Key Takeaways
- Cottage cheese ice cream is high in protein, lower in sugar, and surprisingly creamy when blended properly
- A high-powered blender gives the smoothest, creamiest texture — no ice cream maker needed
- Freezing for 3–4 hours (or overnight) gives you the best scoopable consistency
- All seven recipes are customizable, beginner-friendly, and work with full-fat or low-fat cottage cheese
- These recipes work as post-workout treats, kid-friendly desserts, and summer party showstoppers
- Most flavors can be stored in the freezer for up to 2 weeks
Why Cottage Cheese Works So Well as Ice Cream
Before jumping into the recipes, it helps to understand why this actually works — because once you get it, you’ll want to experiment with flavors forever.
Cottage cheese has a naturally mild, slightly tangy flavor that blends almost completely into the background once you add sweeteners and mix-ins. When blended at high speed, the curds break down completely and the result is a thick, smooth, velvety base that freezes into something surprisingly similar to soft-serve or gelato in texture.
Full-fat cottage cheese gives the richest, creamiest result — and that’s what I’d recommend for most of these recipes. Low-fat works too, but the texture is slightly icier and less indulgent. The protein content stays high either way, which is part of what makes this such a great swap for traditional ice cream.
I’ve noticed that the blending step is where most people go wrong. Under-blending leaves small grainy bits that become more noticeable after freezing. Give it a full 60–90 seconds in a high-powered blender — you want it completely silky before it goes into the freezer container.
What You’ll Need
Kitchen Tools:
- High-powered blender or food processor (a high-powered blender gives the best results)
- Rubber spatula
- Freezer-safe loaf pan or shallow container (silicone works great)
- Plastic wrap or a tight-fitting lid
- Ice cream scoop for serving
Pantry Staples Used Across These Recipes:
- Full-fat cottage cheese (16 oz tubs — one tub makes a generous 2-serving batch)
- Honey, maple syrup, or monk fruit sweetener
- Pure vanilla extract
- Cocoa powder, nut butters, fresh fruit, or chocolate chips depending on the flavor
- Pinch of salt (this one small addition makes a noticeable difference in flavor depth)
Optional Add-Ins and Swaps:
- Frozen fruit (great for natural sweetness and bright flavor)
- Greek yogurt (can replace up to half the cottage cheese for extra tang)
- Protein powder (unflavored blends in seamlessly)
- Cream cheese (a tablespoon or two adds richness to chocolate-based versions)
Step-by-Step Guide: How to Make Cottage Cheese Ice Cream
The process is the same across all seven recipes with small ingredient variations. Master this method once and every flavor becomes effortless.
Step 1 — Blend Until Completely Smooth
Add your cottage cheese to the blender first, then your sweetener and vanilla extract. Blend on high for 60–90 seconds. Stop and scrape down the sides halfway through. You’re looking for a texture that looks like thick, pourable cream — completely smooth with no visible lumps or graininess. If you hold a spoonful up, it should coat the spoon evenly with no texture variation.
This is the most important step in the whole process. A fully smooth base = creamy frozen ice cream. A partially blended base = icy, grainy disappointment. Don’t rush it.
Step 2 — Add Your Flavor Base
Once the cottage cheese base is silky smooth, add your flavoring ingredients — whether that’s cocoa powder, nut butter, fresh strawberries, mango chunks, or whatever the specific recipe calls for. Blend again for another 30–45 seconds until everything is fully incorporated and the color is even throughout.
Taste at this point. Adjust sweetness if needed. This is your chance to make it yours — a little more honey, a splash more vanilla, a pinch more salt. Once it’s frozen, adjusting flavor isn’t possible, so getting it right in the blender matters.
Step 3 — Pour Into Your Freezer Container
Pour your blended mixture into a freezer-safe loaf pan or shallow container. Spread it evenly with a spatula. If you’re adding any mix-ins like chocolate chips, crushed cookies, or fruit swirls, stir them in now or scatter them across the top and gently fold them through.
Cover the surface directly with plastic wrap — press it right down onto the surface of the ice cream base. This prevents ice crystals from forming on top, which is what gives you that dry, freezer-burned texture if you skip this step.
Step 4 — Freeze for 3–4 Hours Minimum
Freeze for at least 3–4 hours. For the best, most scoopable texture that most closely resembles traditional ice cream, freeze overnight. I’ve tried both, and the overnight version consistently gives a cleaner scoop and a slightly denser, more satisfying texture.
When you’re ready to serve, pull it from the freezer and let it sit at room temperature for 5–8 minutes before scooping. This brief softening time makes a big difference — straight from the freezer it can be quite firm, but after a few minutes it scoops beautifully.
Step 5 — Scoop, Top, and Serve
Use a warmed ice cream scoop (run it under warm water and dry it) for the cleanest, most satisfying scoops. Serve in bowls, cones, or cups. Add your toppings of choice — fresh fruit, a drizzle of honey, granola, chocolate sauce, or chopped nuts — and enjoy immediately.
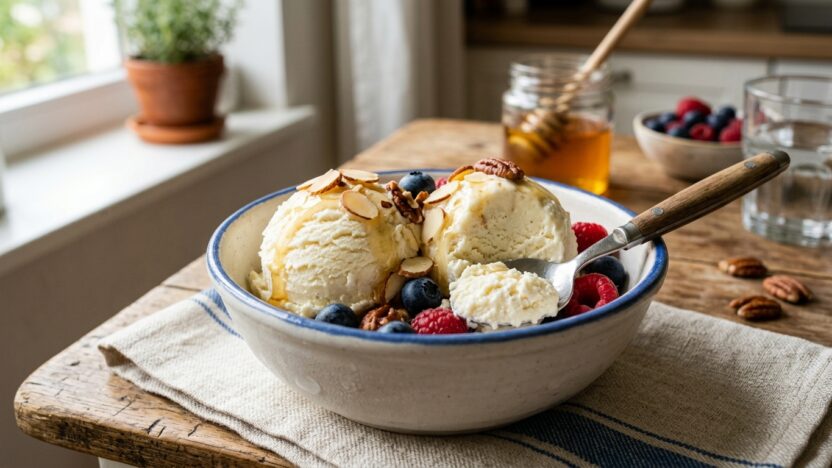
Recipe 1: Classic Vanilla Bean
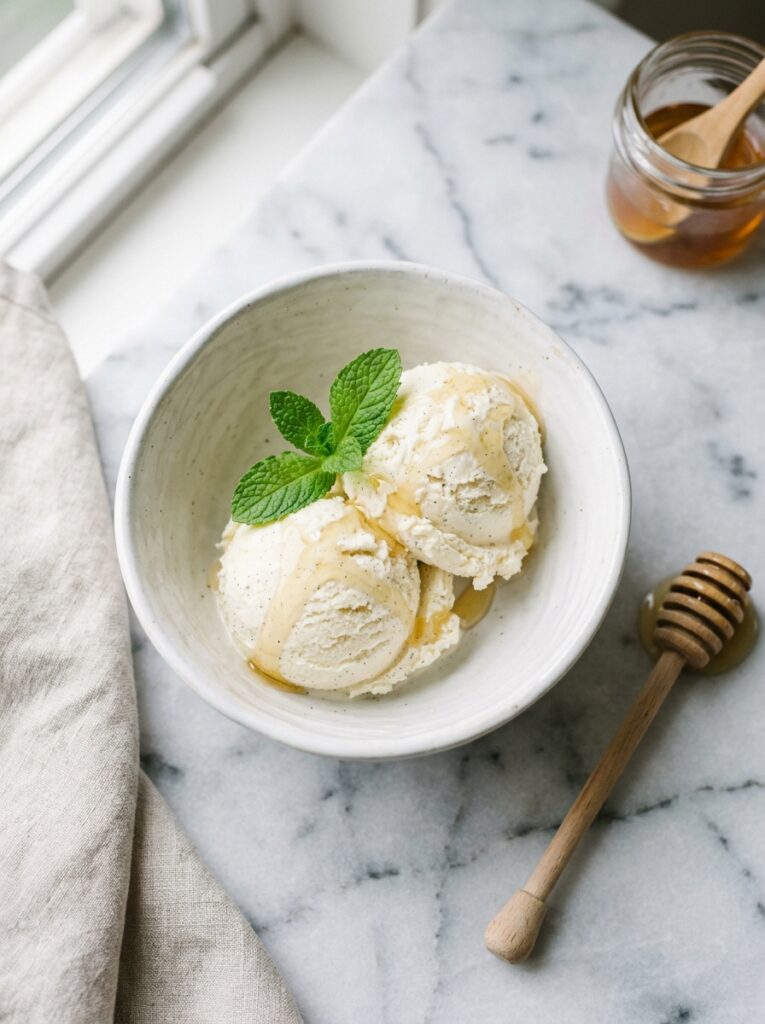
Vanilla might seem simple, but done right it’s the flavor everyone reaches for first. This version uses real vanilla bean paste — not just extract — which gives you those beautiful dark flecks in every scoop and a depth of flavor that plain extract just can’t match. It’s creamy, lightly sweet, and versatile enough to top with anything.
Ingredients:
- 2 cups full-fat cottage cheese
- 3 tablespoons honey (or maple syrup)
- 1 teaspoon vanilla bean paste (or 1½ teaspoons pure vanilla extract)
- 1 tablespoon cream cheese
- Pinch of salt
- Optional: 2 tablespoons plain Greek yogurt for added tang
Instructions:
- Add cottage cheese, cream cheese, honey, and salt to a high-powered blender.
- Blend on high for 90 seconds until completely smooth with no visible texture.
- Add vanilla bean paste and blend for another 20 seconds.
- Taste and adjust sweetness. Add Greek yogurt now if using.
- Pour into a freezer-safe loaf pan. Press plastic wrap directly onto the surface.
- Freeze for a minimum of 4 hours or overnight.
- Let sit at room temperature for 5–8 minutes before scooping. Serve with a drizzle of honey.
In my experience, vanilla bean paste is worth the extra few dollars over extract here — you can taste and see the difference in every single scoop.
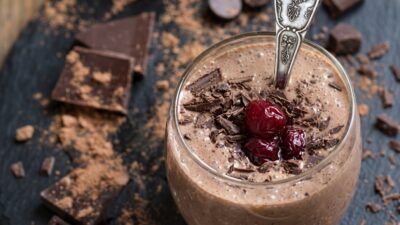
Recipe 2: Double Chocolate Fudge
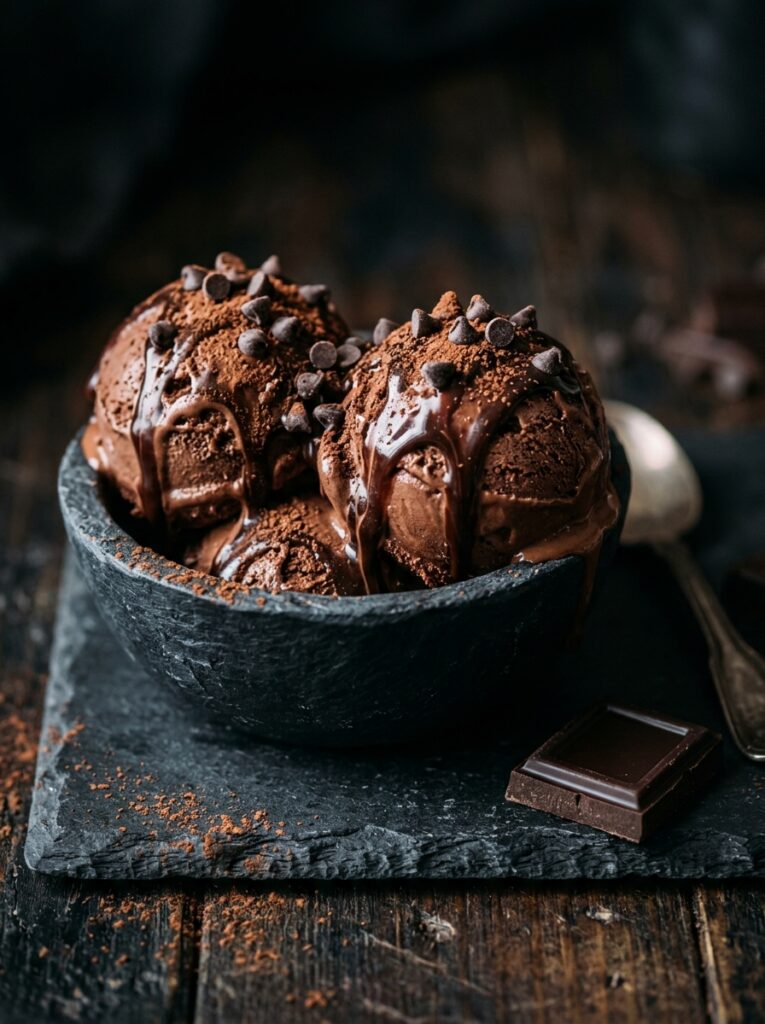
This one is for the chocolate lovers who need convincing that a healthier dessert can still feel genuinely indulgent. Deep cocoa flavor, a fudgy richness from peanut butter, and optional chocolate chip mix-ins make this one the recipe people always want the full details on when they taste it. Nobody ever guesses the base is cottage cheese.
Ingredients:
- 2 cups full-fat cottage cheese
- 3 tablespoons unsweetened cocoa powder
- 3 tablespoons honey or maple syrup
- 2 tablespoons peanut butter or almond butter
- 1 teaspoon pure vanilla extract
- Pinch of salt
- ¼ cup mini chocolate chips (for folding in)
- Optional: 1 tablespoon cream cheese for extra richness
Instructions:
- Blend cottage cheese on high until completely smooth, about 90 seconds. Scrape down sides halfway.
- Add cocoa powder, honey, peanut butter, vanilla, and salt. Blend another 45 seconds until fully combined and evenly colored.
- Taste — add more cocoa for deeper chocolate flavor or more honey for sweetness.
- Pour into a loaf pan and fold in mini chocolate chips.
- Cover surface directly with plastic wrap and freeze for 4 hours minimum.
- Remove from freezer, let soften 5–8 minutes, then scoop and serve. Drizzle with dark chocolate sauce if you want to go all out.
Recipe 3: Strawberry Swirl
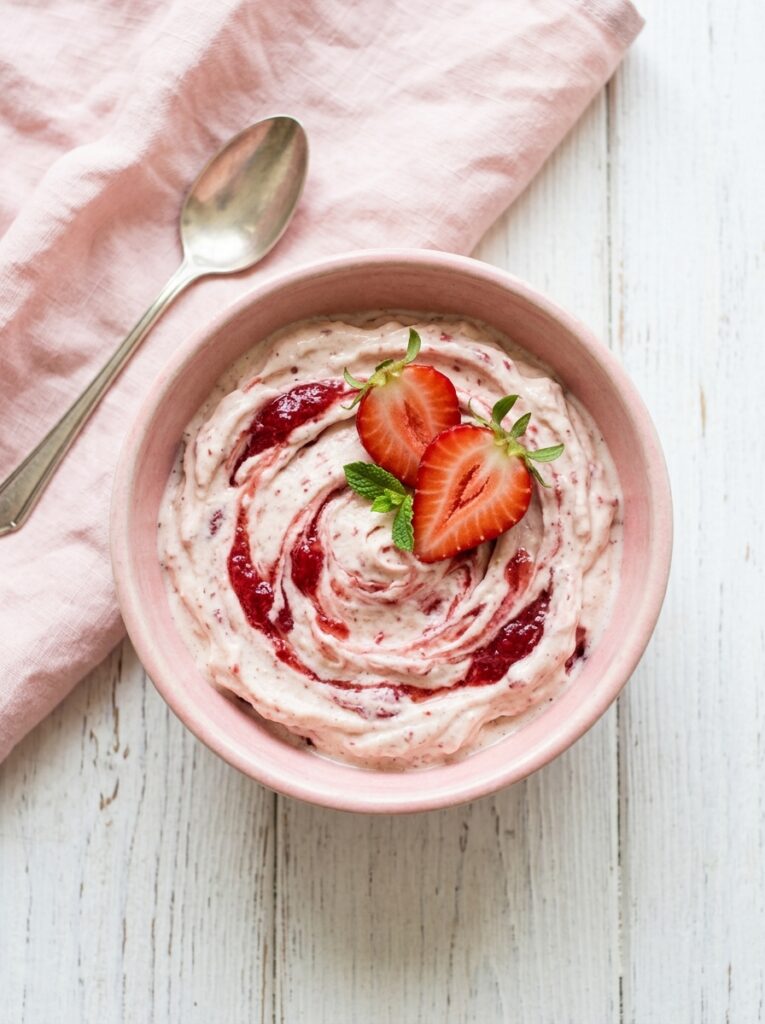
Fresh strawberries blended right into the cottage cheese base create a naturally pink, fruity ice cream that tastes like summer in a bowl. The swirl effect — made by rippling a simple strawberry compote through the base before freezing — is as beautiful as it is delicious. This is the one kids go absolutely crazy for.
Ingredients:
- 2 cups full-fat cottage cheese
- 1 cup fresh or frozen strawberries, hulled
- 2½ tablespoons honey
- 1 teaspoon vanilla extract
- Pinch of salt
- ½ cup additional fresh strawberries, diced small (for the swirl)
- 1 teaspoon lemon juice
Instructions:
- Blend cottage cheese with honey, vanilla, and salt until completely smooth, about 90 seconds.
- Add 1 cup of strawberries and blend until fully incorporated and pink throughout.
- In a small bowl, mash the diced strawberries with lemon juice until jammy and saucy.
- Pour the blended base into your loaf pan. Spoon the mashed strawberry swirl on top in ribbons.
- Use a skewer or butter knife to gently marble the swirl through the base — don’t overmix, just create ribbons.
- Cover and freeze for 4 hours or overnight.
- Scoop and serve with fresh strawberry slices on top.
Recipe 4: Peanut Butter Banana

This flavor combination feels like childhood in the best possible way. Ripe bananas add natural sweetness so you barely need any added sugar, and the peanut butter brings that warm, roasty richness that makes this feel more like a treat than a health food — even though it genuinely is one. Ripe, spotty bananas work best here for maximum sweetness.
Ingredients:
- 2 cups full-fat cottage cheese
- 2 ripe bananas, sliced and frozen
- 3 tablespoons creamy peanut butter
- 1 tablespoon honey (reduce or omit if bananas are very ripe)
- 1 teaspoon vanilla extract
- Pinch of salt
- Optional: ¼ cup mini chocolate chips
Instructions:
- Freeze your banana slices ahead of time — at least 2 hours. Frozen bananas blend smoother and make the base naturally thicker.
- Blend cottage cheese until smooth, about 90 seconds.
- Add frozen banana slices, peanut butter, honey, vanilla, and salt. Blend until completely smooth and creamy, about 60 more seconds.
- Taste — ripe bananas vary in sweetness, so adjust honey accordingly.
- Fold in chocolate chips if using, then pour into a freezer container.
- Cover and freeze 3–4 hours or overnight. Let soften 5 minutes before scooping.
I’ve noticed that using frozen banana (not fresh) in this recipe makes a noticeably creamier, less icy result. It’s a small detail that makes a real difference.
Recipe 5: Mango Coconut

Close your eyes and this one almost transports you to a beach somewhere warm. The mango brings bright, tropical sweetness, and the coconut milk rounds it out with a creamy, slightly nutty richness. It’s dairy-forward but still feels light and refreshing — exactly what you want when the temperature climbs past 90 degrees.
Ingredients:
- 2 cups full-fat cottage cheese
- 1½ cups frozen mango chunks
- 3 tablespoons full-fat coconut milk (from a can, shaken)
- 2 tablespoons honey or agave
- 1 teaspoon lime juice
- ½ teaspoon lime zest
- Pinch of salt
- ¼ cup toasted coconut flakes (to fold in or top)
Instructions:
- Add cottage cheese and coconut milk to your blender. Blend 90 seconds until smooth.
- Add frozen mango, honey, lime juice, lime zest, and salt. Blend until vibrant yellow and completely smooth.
- Taste and adjust — a touch more lime juice brightens the flavor beautifully if it tastes flat.
- Pour into your freezer container. Scatter toasted coconut flakes over the top and gently fold through.
- Cover and freeze for 4 hours minimum.
- Serve in a coconut bowl or regular bowl. Top with more toasted coconut and a squeeze of fresh lime.
Recipe 6: Blueberry Cheesecake
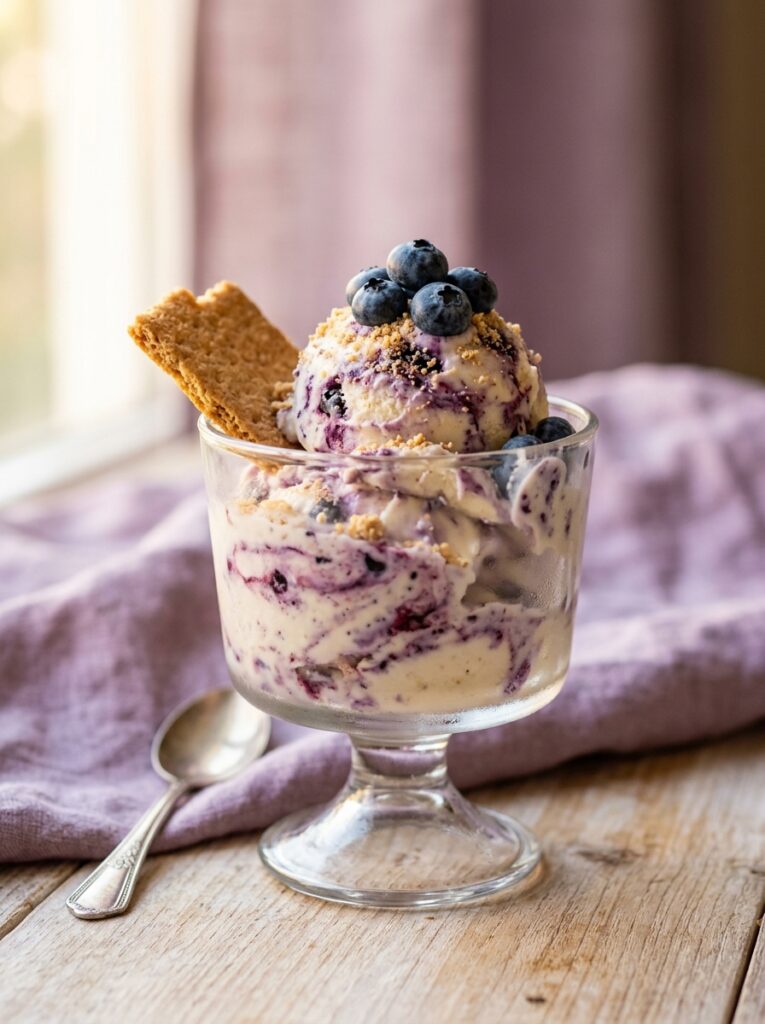
This one tastes almost indecently good for something so simple. The cream cheese adds that signature cheesecake tang, the blueberries give a gorgeous deep purple color, and the graham cracker crumble on top makes every bite taste like the real thing — but with a fraction of the calories and a serious protein boost. It’s become one of the most requested recipes whenever I share it.
Ingredients:
- 2 cups full-fat cottage cheese
- 1 cup fresh or frozen blueberries
- 2 tablespoons cream cheese, softened
- 2½ tablespoons honey
- 1 teaspoon vanilla extract
- 1 tablespoon lemon juice
- Pinch of salt
- ⅓ cup crushed graham crackers (to fold in or top)
Instructions:
- Blend cottage cheese and cream cheese together on high until silky smooth, about 90 seconds.
- Add blueberries, honey, lemon juice, vanilla, and salt. Blend until deep purple and fully combined.
- Taste — if you want more cheesecake tang, add another half tablespoon of cream cheese and blend again.
- Pour into your container. Fold in half the crushed graham crackers, reserving the rest for topping.
- Cover and freeze 4–6 hours or overnight for best texture.
- Scoop into dessert cups. Top with fresh blueberries and the remaining graham cracker crumble.
Recipe 7: Mint Chocolate Chip
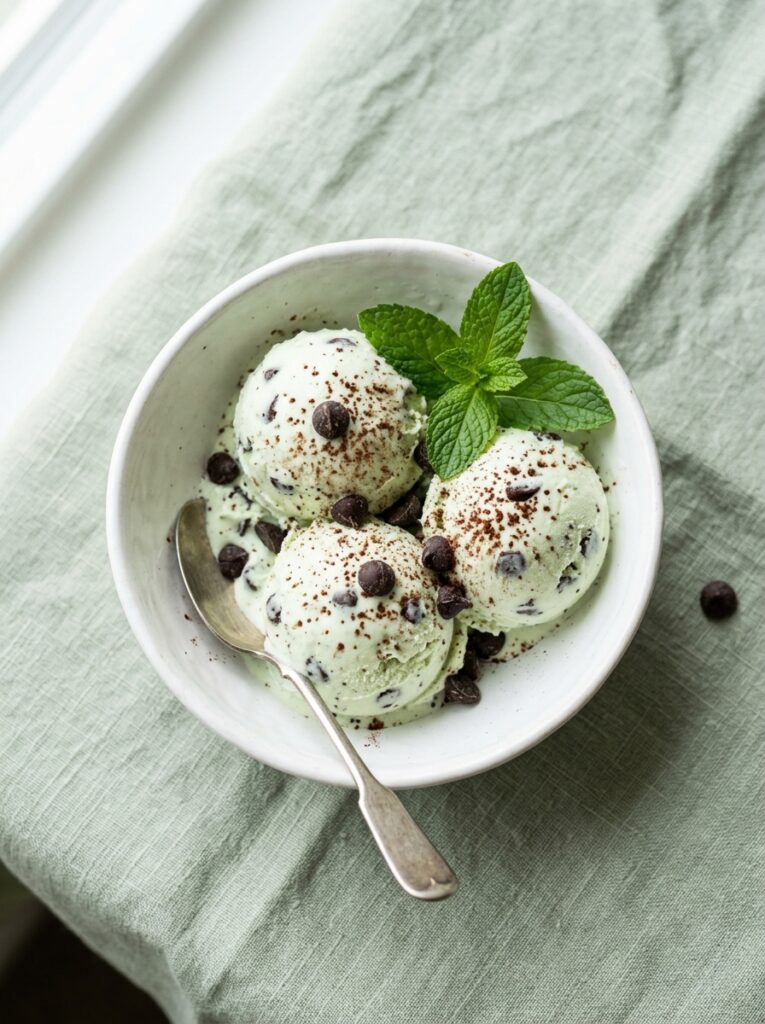
Cool, refreshing, and dotted with dark chocolate in every single bite — this mint chocolate chip version is the summer flavor that gets people genuinely excited. Fresh mint leaves give it a natural green tint and a cleaner, brighter flavor than anything extract-only could produce. It’s cool, creamy, and just sweet enough to feel like a real treat.
Ingredients:
- 2 cups full-fat cottage cheese
- ¼ cup fresh mint leaves, packed (plus more for garnish)
- 2½ tablespoons honey
- ½ teaspoon pure peppermint extract (start small — it’s strong)
- 1 teaspoon vanilla extract
- Pinch of salt
- ⅓ cup dark chocolate chips, roughly chopped
Instructions:
- Blend cottage cheese until smooth, about 90 seconds.
- Add fresh mint leaves, honey, peppermint extract, vanilla, and salt. Blend until the base turns pale green and fully smooth — about 60 seconds.
- Taste carefully — peppermint extract is potent. Start with ½ teaspoon and add more only a few drops at a time.
- Fold in the chopped dark chocolate chips by hand using a spatula. Don’t blend — you want visible chips in every scoop.
- Pour into your loaf pan, press plastic wrap to the surface, and freeze for at least 4 hours.
- Let soften 5 minutes before scooping. Garnish with fresh mint leaves.
A helpful trick is to start with less peppermint extract than you think you need. The cold temperature of freezing actually intensifies mint flavor, so what tastes balanced in the blender can become overwhelming once frozen.
Tips for Best Results
Use full-fat cottage cheese. The fat content is what gives this its creamy, scoopable texture. Low-fat versions work but freeze icier. For the most indulgent result, full-fat is worth it.
Blend longer than feels necessary. Most problems with this recipe — graininess, icy texture, strange mouthfeel — come from under-blending. Give it a full 90 seconds on high with a quality blender. When in doubt, blend more.
Sweeten before freezing, not after. Frozen desserts need slightly more sweetness than room-temperature ones because cold dulls your perception of sweetness. Taste your base and make it slightly sweeter than you think it needs to be.
Press the plastic wrap directly onto the surface. This is the trick that prevents ice crystals from forming on top. It takes three extra seconds and makes a noticeable difference in final texture.
Let it soften before scooping. Five to eight minutes at room temperature transforms a rock-hard frozen block into something that scoops beautifully. Set a timer — it’s worth the short wait.
Common Mistakes to Avoid
Using a weak blender. A standard blender often can’t fully break down cottage cheese curds. If you don’t have a high-powered option, a food processor works as a decent substitute. A hand blender typically won’t give you the right texture.
Adding too much liquid. Extra milk, juice, or coconut water thins out the base and results in an icy, popsicle-like texture instead of creamy ice cream. Stick to the measurements in each recipe.
Skipping the freeze time. Three hours minimum, but four to six is better. Pulling it out too early gives you a thick, soft-serve-like result that melts too fast — not the clean scoopable texture you’re after.
Over-mixing after adding chocolate chips or swirls. Once you’ve added your swirl or mix-ins, a few gentle folds is all you need. Over-mixing turns a beautiful swirl into a uniform color, and it breaks down your chocolate chips.
Not tasting before freezing. This is your one and only chance to adjust. Flavor profiles shift slightly once frozen — slightly sweeter and slightly more intense on the spice or extract notes — so use that tasting step wisely.
Variations and Swaps
| Base Swap | Effect | Best For |
|---|---|---|
| Low-fat cottage cheese | Slightly icier texture, lower calories | Calorie-conscious versions |
| Greek yogurt (replace half) | Tangier flavor, slightly softer texture | Vanilla and berry flavors |
| Ricotta cheese (replace half) | Richer, creamier result | Cheesecake and chocolate versions |
| Dairy-free cottage cheese | Vegan-friendly, similar texture | All recipes |
| Monk fruit sweetener | Zero sugar, similar sweetness | Keto-friendly versions |
| Frozen fruit (in place of fresh) | Thicker, creamier base | Fruit-based flavors |
Storage Guide
| Storage Method | Duration | Tips |
|---|---|---|
| Freezer (covered with plastic wrap) | Up to 2 weeks | Press wrap directly onto surface to prevent ice crystals |
| Freezer (airtight container) | Up to 3 weeks | Leave ½ inch of space at top for expansion |
| Freezer (individual portions) | Up to 2 weeks | Portion into silicone muffin cups before freezing for easy servings |
| Room temperature (softening) | 5–8 minutes | Don’t leave longer — it melts faster than traditional ice cream |
| Refreezing after partial melt | Not recommended | Ice crystals form and texture becomes grainy |
FAQs
Does cottage cheese ice cream actually taste good? Yes — genuinely. The cottage cheese flavor disappears almost completely once blended smooth and frozen. What you taste is whatever flavor you’ve added: chocolate, strawberry, vanilla, mint. Most people who try it can’t identify the base ingredient without being told.
Do I need an ice cream maker for these recipes? Not at all. Every recipe here uses the freeze-and-scoop method — blend, pour into a container, freeze, and serve. No ice cream maker, no churning, no special equipment beyond a good blender.
How long does cottage cheese ice cream take to freeze? Plan for a minimum of 3–4 hours, though overnight gives the best texture. If you’re short on time, freezing in a shallow pan speeds things up slightly since the thinner layer freezes faster.
Can I make these recipes dairy-free? Yes. Several brands make dairy-free cottage cheese that works well in these recipes. The texture is very similar and the blending method is identical. Use a dairy-free chocolate chip and skip the cream cheese in recipes that call for it, or sub with a dairy-free cream cheese alternative.
Why does my cottage cheese ice cream get so hard in the freezer? This is normal — unlike commercial ice cream, which contains stabilizers and emulsifiers that keep it scoopable, homemade versions get firmer. The solution is simple: pull it from the freezer 5–8 minutes before serving. That short softening window makes all the difference.
Is cottage cheese ice cream actually healthy? Compared to traditional ice cream, yes — significantly. It’s much higher in protein, lower in sugar (depending on how much sweetener you add), and contains real whole-food ingredients. It won’t replace a full meal, but as desserts go, it’s one of the more nutritious options available.
Conclusion
Summer desserts don’t have to feel like a compromise between something that tastes good and something that’s actually good for you — and these seven recipes prove exactly that. Each one is built around a creamy, protein-packed base that’s easier to make than most people expect and far more delicious than the ingredient list suggests. Whether you start with the classic vanilla, go straight for the double chocolate, or jump into that tropical mango coconut right away, you’re going to be glad you tried it. I’ve seen how recipes like these genuinely change the way people think about healthy eating — one creamy, satisfying scoop at a time. Save this to your Pinterest boards, share it with a friend who’s obsessed with frozen treats, and enjoy every single bite this summer!