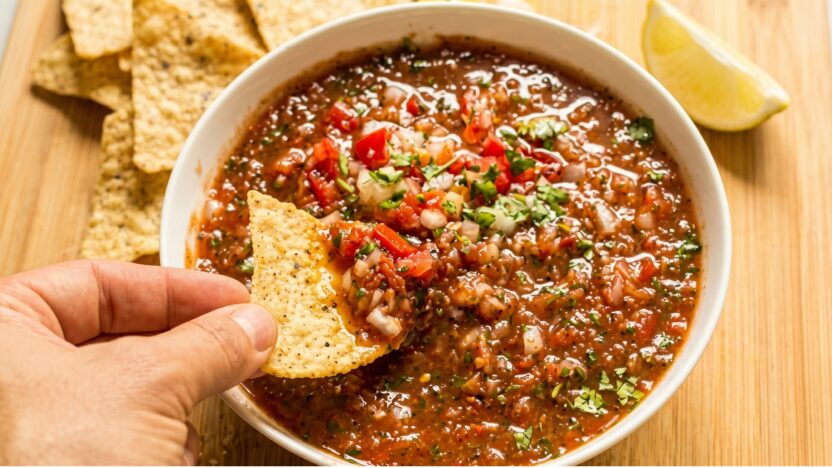
Do you crave the bold, smoky flavors of a professional dip but lack the time to spend hours in the kitchen? You can now bring that authentic experience home with a simple Roasted Tomato Salsa that comes together in just eight minutes.
This game-changing method turns basic pantry staples into a vibrant appetizer that will impress your guests. It is the perfect solution for busy home cooks who want high-quality results without the long wait.
Mastering this easy salsa recipe allows you to elevate any gathering with minimal effort. Whether you are hosting a game night or just need a quick snack, this technique ensures you never have to settle for store-bought jars again.
Key Takeaways
- Achieve professional flavor profiles in under ten minutes.
- Use high-heat techniques to unlock deep, smoky notes.
- Transform simple pantry ingredients into a gourmet appetizer.
- Save time without sacrificing the quality of your homemade dips.
- Impress friends and family with a fresh, vibrant snack.
The Secret to Restaurant-Style Roasted Tomato Salsa
If you have ever wondered why your favorite local spot serves such addictive salsa, the answer lies in the roasting process. Achieving that deep, complex flavor at home is not just possible; it is a rewarding culinary experience. By focusing on the balance of char, acidity, and heat, you can easily replicate those smoky notes in your own kitchen.
Why Homemade Salsa Beats Store-Bought Options
When you choose to make homemade salsa, you gain complete control over the quality of your ingredients. Store-bought jars often rely on preservatives and stabilizers to maintain a long shelf life, which can dull the vibrant taste of fresh produce. Nothing compares to the bright, zesty punch of vegetables that were roasted just minutes before serving.
Furthermore, mass-produced options frequently lack the depth that comes from a proper char. By preparing your own, you ensure that every bite is packed with fresh, authentic flavor that simply cannot be found on a grocery store shelf. You are not just making a condiment; you are crafting a centerpiece for your meal.
Understanding the Flavor Profile of Authentic Salsa
The hallmark of a great Roasted Tomato Salsa is the harmony between contrasting elements. The roasting process caramelizes the natural sugars in the tomatoes, providing a subtle sweetness that anchors the dish. This sweetness is then perfectly cut by the sharp, bright acidity of fresh lime juice.
Finally, the heat from peppers adds a necessary layer of complexity that keeps your palate engaged. Mastering this balance is the true secret to success. When you learn to adjust these components to your personal preference, you transform a simple dip into a professional-grade culinary creation.
Essential Tomato Salsa Ingredients for Maximum Flavor
Your journey toward the ultimate homemade salsa begins with these essential building blocks. Selecting high-quality produce ensures that every bite delivers a punch of authentic, vibrant flavor. By understanding how each component interacts, you can easily customize your recipe to suit your specific palate.
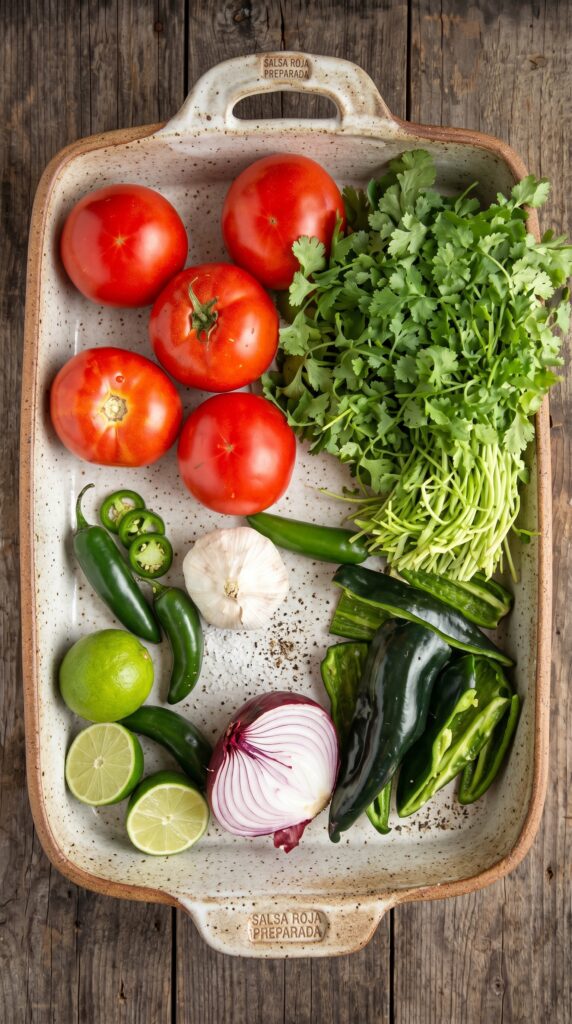
The Role of Aromatics: Garlic and Onion
Garlic and onion serve as the backbone of any great tomato salsa. When you roast these aromatics, their natural sugars caramelize, which transforms their sharp, pungent bite into a mellow and savory sweetness. This process creates a deep, complex foundation that raw ingredients simply cannot match.
Selecting the Right Peppers for Your Heat Preference
Choosing the right pepper is the most effective way to control the intensity of your homemade salsa. Jalapeños offer a classic, approachable heat that works well for most guests. If you prefer a more intense experience, serrano peppers provide a sharper, more concentrated spice level that lingers on the tongue.
The Importance of Fresh Cilantro and Lime Juice
Fresh cilantro and lime juice are the final keys to achieving a balanced profile. The bright, citrusy acidity of the lime cuts through the richness of the roasted vegetables, while the cilantro adds a necessary herbal freshness. These tomato salsa ingredients provide the lift needed to keep the flavor profile from feeling too heavy or one-dimensional.
| Ingredient | Primary Role | Flavor Impact |
|---|---|---|
| Roasted Onion | Base Depth | Sweet and Savory |
| Jalapeño | Heat Source | Mild to Medium Spice |
| Lime Juice | Acidity | Bright and Tangy |
| Fresh Cilantro | Aromatic Finish | Herbal and Fresh |
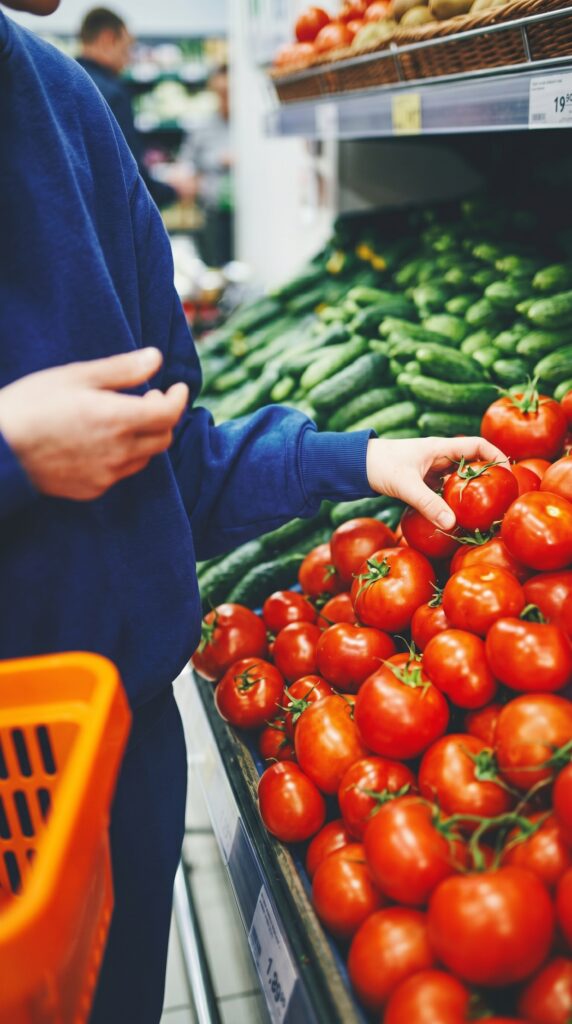
Selecting the Best Tomatoes for Your Homemade Salsa
Not all tomatoes are created equal when it comes to crafting the perfect dip. The foundation of any great homemade salsa relies heavily on the quality and variety of the fruit you choose. Making the right selection ensures your final product has the ideal balance of body and brightness.
Roma Tomatoes vs. Vine-Ripened Varieties
Roma tomatoes are widely considered the gold standard for thick, hearty salsa. Because they contain less water and more flesh, they hold their shape well during the roasting process. This results in a dip that is not overly watery or thin.
In contrast, vine-ripened varieties offer an intense, natural sweetness that can elevate your recipe. While they are much juicier, they provide a vibrant flavor profile that is hard to beat. Many cooks prefer to mix these two types to achieve the best of both worlds: the structure of a Roma and the deep flavor of a vine-ripened tomato.
When to Use Canned Tomatoes for Consistency
Sometimes, fresh produce simply isn’t at its peak, especially during the colder months. Using high-quality canned tomatoes is a smart strategy to maintain a consistent result for your tomato salsa throughout the entire year.
Look for fire-roasted canned tomatoes to save time while still capturing that authentic charred flavor. These options are picked at the height of freshness, ensuring your kitchen creations remain delicious regardless of the current growing season. When you rely on canned goods, you gain a reliable texture that makes every batch taste just as good as the last.
Preparing Your Ingredients for the Quick Roast
Achieving that restaurant-quality char starts long before the heat hits your pan. When you are working with a tight 8-minute window, proper preparation is the difference between a smoky masterpiece and a soggy mess. By organizing your tomato salsa ingredients early, you ensure every piece cooks at the same speed.
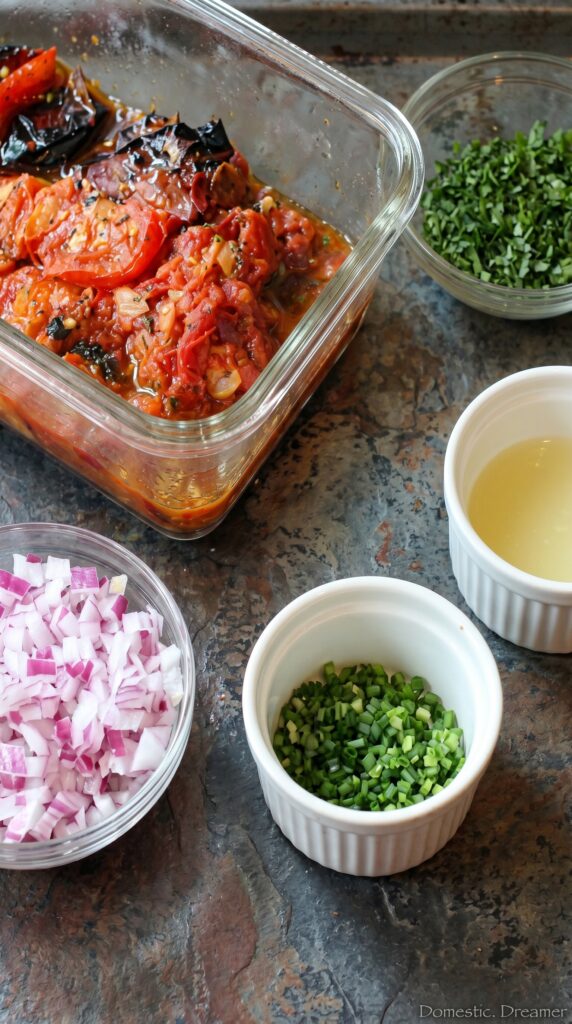
Proper Washing and Drying Techniques
Start by thoroughly washing all your produce under cool, running water to remove any debris. It is vital to pat everything completely dry with a clean kitchen towel or paper napkins afterward. Excess moisture on the surface of your vegetables will cause them to steam rather than sear.
If your vegetables are wet, they will not develop that signature charred flavor that defines an easy salsa recipe. Taking these few extra seconds to dry your produce ensures the broiler can work its magic immediately. You want a dry surface to encourage the sugars in the tomatoes and onions to caramelize quickly.
Slicing for Even Heat Distribution
Uniformity is the secret weapon for a consistent roast. Slice your tomatoes, onions, and peppers into pieces of similar size so they all reach the perfect level of tenderness at the same time. If you leave some chunks too large, they will remain raw while the smaller pieces turn to ash.
Aim for thick wedges or halves that can withstand high heat without falling apart. This simple technique prevents the common pitfall of having some ingredients burn while others stay undercooked. With these steps, your easy salsa recipe will come together with professional precision every time.
Mastering the 8-Minute Roasting Technique
Mastering the broiler is the fastest way to elevate your homemade salsa game. This high-heat method mimics the traditional open-flame roasting used in authentic kitchens, providing a deep, smoky flavor that defines a truly great roasted salsa recipe.
Using the Broiler for Charred Perfection
To achieve that signature char, position your oven rack about six inches away from the heating element. Place your vegetables on a sturdy, rimmed baking sheet to catch any juices that release during the process. Consistency is key when you want an easy salsa recipe that tastes like it came straight from a restaurant.
Monitoring the Roast to Prevent Burning
Because the broiler uses intense, direct heat, you must keep a close eye on your ingredients. Most vegetables will reach the perfect level of char within eight minutes, but every oven behaves differently. Stay nearby and rotate the pan if you notice one side browning faster than the other.
Safety Tips for High-Heat Cooking
Working with high temperatures requires extra caution to keep your kitchen safe. Always use heavy-duty oven mitts when handling the baking sheet, as the metal will become extremely hot. Never leave the broiler unattended, and ensure your kitchen is well-ventilated to manage any smoke that may occur during the charring process.
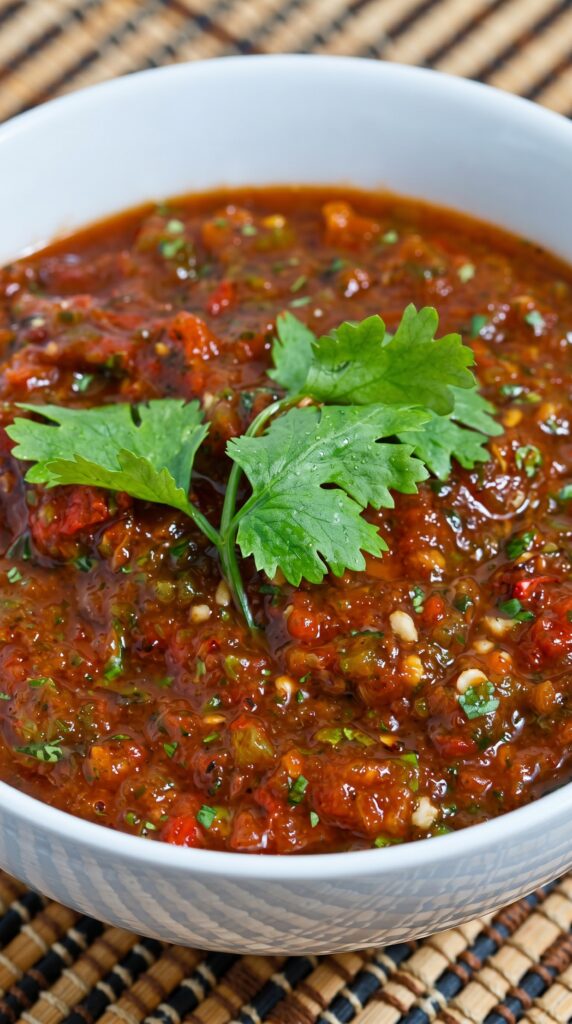
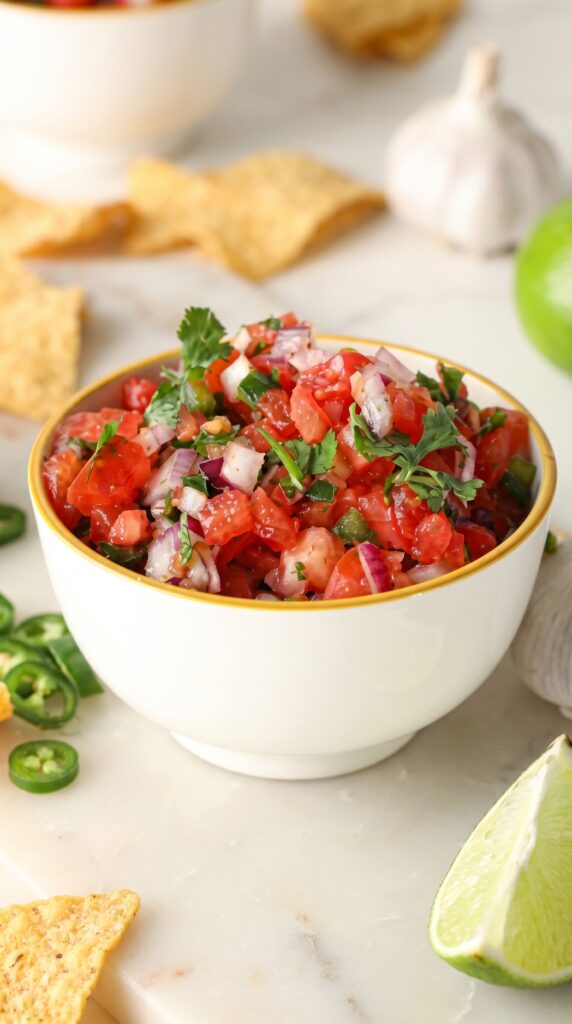
Achieving the Perfect Texture in Your Salsa Dip
Texture is the secret ingredient that turns a simple salsa dip into a restaurant-quality experience. While flavor profiles are essential, the way your ingredients feel on the palate determines the overall enjoyment of your snack. Mastering the consistency of your fresh salsa requires a bit of patience and the right technique.
Pulse vs. Continuous Blend Methods
The method you choose for blending significantly changes the final mouthfeel of your dish. Using the pulse function on your food processor allows you to maintain control over the size of the vegetable pieces. This prevents the ingredients from turning into a thin, watery puree.
Conversely, a continuous blend setting will quickly break down the fibers of your roasted tomatoes and onions. This often results in a uniform, liquid-like consistency that lacks the bite many people crave. For the best results, stick to short, sharp pulses to keep the texture delightfully rustic.
How to Get That Chunky Restaurant Consistency
To achieve that signature chunky look, start by adding your roasted ingredients to the processor in stages. Begin with the harder aromatics like onions and garlic, pulsing them until they reach your desired size. Then, add the tomatoes and cilantro, pulsing just a few more times to incorporate them without over-processing.
Pro tip: Always leave a few larger chunks of tomato to ensure your fresh salsa has a hearty, satisfying texture. This approach ensures your salsa dip holds up perfectly on a sturdy tortilla chip. By carefully monitoring the blending process, you can easily balance the liquid and solid components for a professional finish.
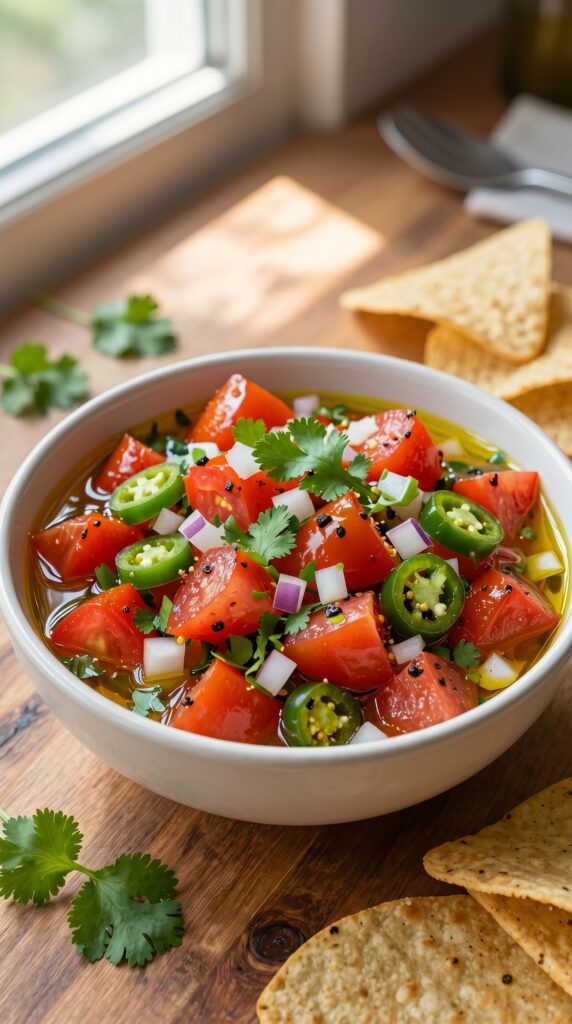
Balancing Heat and Acidity in Your Spicy Salsa
The magic of a great salsa lies in how you balance the intensity of peppers with the sharpness of citrus. Achieving this harmony is the final step in creating a truly professional-grade dip that keeps everyone coming back for more. By understanding these ratios, you can customize your recipe to your exact liking every single time.
Adjusting Jalapeño and Serrano Quantities
When you want to create a spicy salsa, the choice of pepper is your most important tool. Jalapeños offer a mild, approachable heat, while serranos provide a sharper, more intense kick. You should start by adding one pepper at a time to maintain control over the final heat level.
If you prefer a milder experience, remove the seeds and white membranes from the peppers before roasting. This simple step significantly reduces the heat while keeping the authentic flavor intact. Always taste your salsa after each addition to ensure the spice level aligns with your personal preference.
The Science of Acid: Balancing Lime and Vinegar
Acid is the secret ingredient that makes a tangy salsa pop on the palate. Fresh lime juice provides a bright, citrusy note that cuts through the richness of the roasted vegetables. If you find the flavor profile needs more depth, a small splash of white vinegar can add a clean, sharp finish.
The interaction between these acids helps to brighten the roasted flavors and creates a complex, layered taste. Start with a small amount of lime juice and adjust slowly, as too much acid can easily overpower the natural sweetness of the tomatoes. Balancing these elements ensures your final creation is perfectly seasoned and incredibly refreshing.
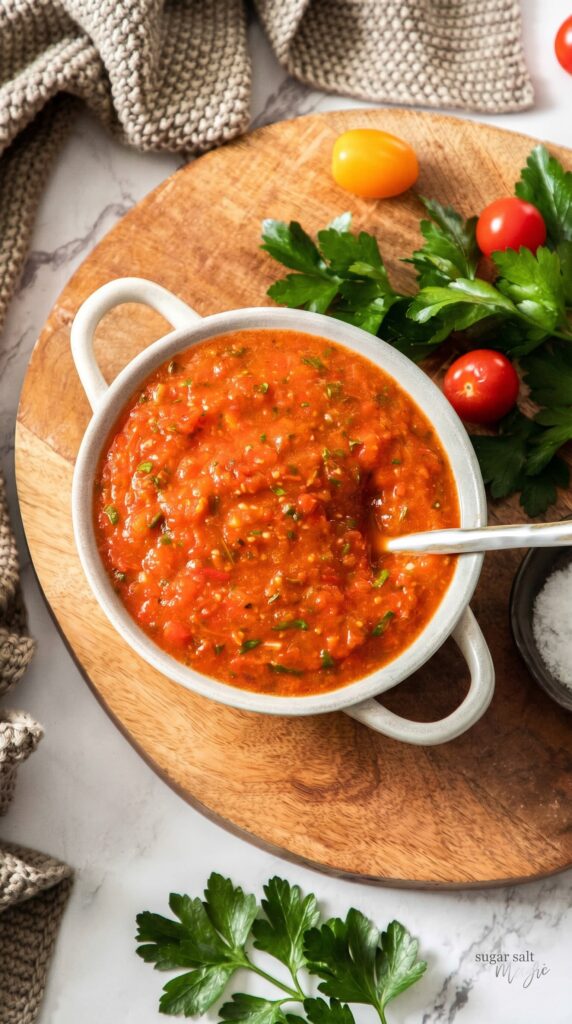
Step-by-Step Guide to Blending Your Roasted Salsa Recipe
Transforming your roasted ingredients into a restaurant-quality dip requires a careful blending process. By following a specific order, you ensure that every bite of your roasted salsa recipe delivers a balanced explosion of flavor.
Combining Ingredients in the Food Processor
Start by placing your charred aromatics and tomatoes into the bowl of your food processor. It is best to add the heartier tomato salsa ingredients first to ensure they break down evenly.
Use the pulse function rather than a continuous blend setting. This technique prevents the mixture from turning into a thin puree and helps you maintain that desirable chunky texture.
Adding Salt and Spices at the Right Time
Seasoning should happen toward the end of the process to avoid over-salting. Once you have achieved your preferred consistency, sprinkle in your salt, cumin, and any extra herbs.
Give the mixture a final, quick pulse to incorporate these dry spices throughout the spicy salsa. This method ensures that the seasoning is evenly distributed without breaking down the texture of the vegetables.
Troubleshooting Common Blending Issues
Even experienced cooks occasionally run into minor issues when preparing a fresh batch. Refer to the table below to quickly fix common problems and save your dip.
| Issue | Cause | Solution |
|---|---|---|
| Too watery | Over-processing | Drain excess liquid |
| Uneven chunks | Large pieces | Pulse 2-3 more times |
| Lacks flavor | Under-seasoning | Add salt or lime |
If your spicy salsa feels too thin, you can strain it through a fine-mesh sieve for a few minutes. Remember that the tomato salsa ingredients will continue to release moisture as they sit, so keep your final consistency slightly thicker than you think you need.
How to Store and Preserve Your Fresh Salsa
Keeping your roasted tomato creation fresh requires just a few simple habits. Proper storage is the best way to ensure your fresh salsa maintains its vibrant flavor and safety over time. By following these guidelines, you can enjoy your culinary efforts for days or even weeks to come.
Refrigeration Best Practices for Freshness
The refrigerator is the ideal environment for short-term storage. Always transfer your tangy salsa into a clean, airtight glass jar or a high-quality plastic container. This prevents the mixture from absorbing odors from other items in your fridge, such as onions or strong cheeses.
For the best results, keep these tips in mind:
- Store the container in the main body of the fridge rather than the door.
- Ensure the lid is sealed tightly after every use to prevent oxidation.
- Consume the batch within five to seven days for peak quality.
Freezing Your Salsa for Future Use
If you find yourself with a larger batch than you can eat quickly, freezing is a fantastic option. You can easily preserve your tangy salsa by placing it in freezer-safe bags or containers. Be sure to leave a small amount of space at the top, as the liquid will expand slightly when it turns to ice.
When you are ready to enjoy your fresh salsa again, simply thaw it in the refrigerator overnight. You may notice a slight change in texture, but the bold flavors will remain intact. Stir the mixture well before serving to reincorporate any separated juices.
| Storage Method | Ideal Temperature | Maximum Duration |
|---|---|---|
| Refrigerator | 35°F – 40°F | 7 Days |
| Freezer | 0°F or below | 3 Months |
| Countertop | Not Recommended | 2 Hours |
Creative Ways to Serve Your Tangy Salsa
Beyond the bowl, your roasted tomato creation offers endless culinary possibilities for every meal of the day. While it is a staple for casual snacking, this tangy salsa can easily become the star ingredient in your kitchen. By experimenting with different pairings, you will discover how to add depth and excitement to your everyday cooking.
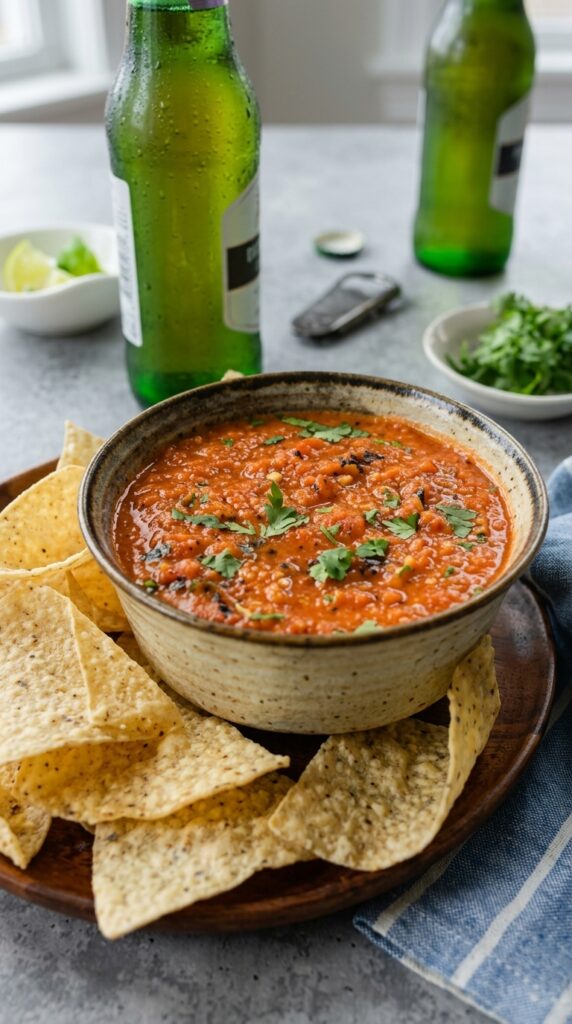
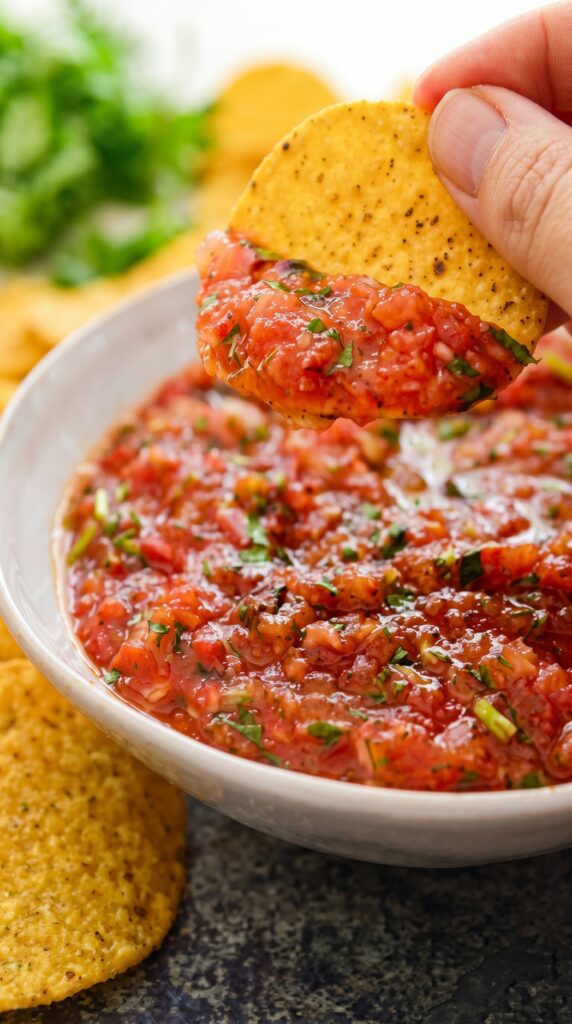
Pairing with Classic Tortilla Chips
The most iconic way to enjoy your salsa dip is with a bowl of crispy, salted tortilla chips. For the best experience, choose thick-cut corn chips that can hold the weight of your chunky roasted vegetables. This simple combination highlights the fresh, charred flavors of the tomatoes and peppers without any extra effort.
Using Salsa as a Topping for Grilled Meats
If you want to elevate your dinner, try using your spicy salsa as a vibrant topping for grilled proteins. It works beautifully as a fresh alternative to heavy barbecue sauces or butter-based glazes. Simply spoon a generous amount over grilled chicken, steak, or white fish right before serving to add a bright, acidic finish.
Incorporating Salsa into Breakfast Dishes
You can also bring a bold kick to your morning routine by adding your homemade creation to breakfast favorites. A spoonful of this spicy salsa transforms basic scrambled eggs or a breakfast burrito into a restaurant-quality meal. It provides the perfect balance of heat and acidity to wake up your palate early in the day.
| Meal Type | Serving Suggestion | Flavor Impact |
|---|---|---|
| Appetizers | Tortilla Chips | Crunchy and Refreshing |
| Main Course | Grilled Chicken | Zesty and Savory |
| Breakfast | Scrambled Eggs | Bold and Energizing |
| Snack | Vegetable Sticks | Light and Healthy |
Whether you are hosting a party or just preparing a quick lunch, this salsa dip is incredibly versatile. Keep a jar ready in your refrigerator to ensure you always have a flavorful topping on hand. With these creative ideas, you will find new ways to enjoy your homemade tangy salsa throughout the entire week.
Common Mistakes to Avoid When Making Roasted Tomato Salsa
Achieving that perfect restaurant-style flavor requires avoiding a few common kitchen pitfalls. Even when you follow a high-quality roasted salsa recipe, small errors can significantly alter the final outcome. By staying mindful of your technique, you can ensure your dip remains vibrant and delicious every single time.
Over-processing and Watery Results
One of the most frequent mistakes is turning your food processor on and walking away. Over-processing breaks down the cell walls of the vegetables too much, which releases excess liquid and creates a thin, watery consistency. Instead, use short, controlled pulses to maintain a chunky, appetizing texture that mimics your favorite local eatery.
Under-seasoning Your Final Batch
Many cooks are afraid to add enough salt, but tomato salsa relies on seasoning to bridge the gap between raw and roasted flavors. Salt acts as a flavor enhancer that brings out the natural sweetness of the charred tomatoes. Always taste your mixture before serving and adjust the salt and lime juice until the flavors truly pop.
Ignoring the Cooling Process
It is tempting to blend your ingredients while they are still piping hot from the broiler. However, ignoring the cooling process can lead to a mushy texture and potential safety hazards. Allowing your vegetables to reach room temperature ensures the ingredients maintain their structural integrity during the blending phase.
| Common Mistake | Resulting Issue | Best Practice |
|---|---|---|
| Continuous Blending | Watery, thin texture | Use short, manual pulses |
| Minimal Seasoning | Flat, bland flavor | Taste and adjust salt/lime |
| Blending Hot Veggies | Mushy, unstable dip | Cool to room temperature |
Avoiding these simple errors will elevate your Roasted Tomato Salsa to a professional level. Whether you are hosting a party or enjoying a snack, your tomato salsa will consistently impress your guests. Keep these tips in mind to master your next roasted salsa recipe with confidence.
Conclusion
Creating a restaurant-style salsa dip at home is a rewarding culinary skill that transforms simple ingredients into a bold experience. You now possess the knowledge to balance heat, acidity, and texture to suit your personal palate.
Feel free to adjust the ratios of peppers or aromatics to discover your own signature flavor profile. Every batch of fresh salsa offers a new opportunity to refine your technique and impress your guests during your next gathering.
Your kitchen is the perfect place to experiment with these roasting methods. Bringing this vibrant, fresh salsa to your table adds a professional touch to any meal or snack. Enjoy the process of crafting a high-quality salsa dip that keeps your friends and family coming back for more.